...
- Log in to Portal .
- Next, click on "Submit New Ticket" on the right side of your screen beneath the heading "Support Summary."


- A new form will be opened that you can use to create a new ticket.
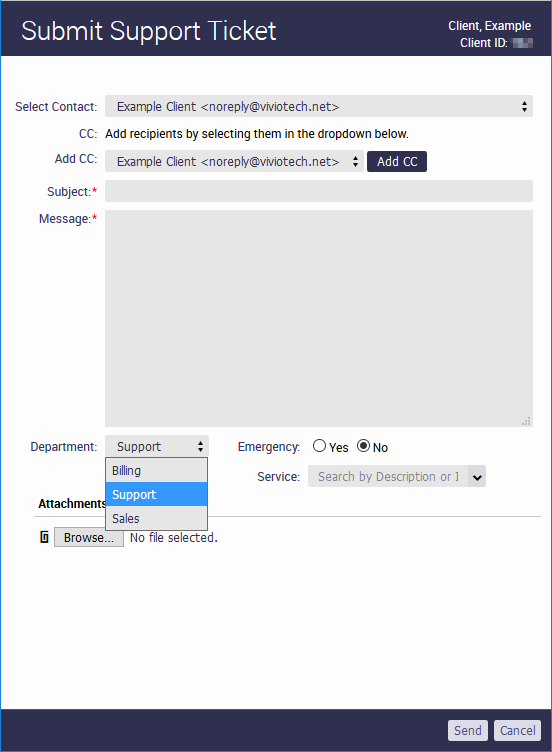

- If you have multiple contacts on your account you can select the appropriate one, then you can enter any addresses you wish to be cc'd, a subject, and your message or request. All required forms will be marked with a red asterisk.
- The form will default to sending the ticket to the Support department, but as shown in the image above, you can select other departments as necessary. We highly encourage you to select the appropriate department for your ticket to ensure a rapid response.
- If your question relates to a specific service, we highly recommend that you select that via the service field. This will save our staff time when reviewing your request.
- If you have any screenshots or other documents that need to be attached to the ticket, you can include them via the attachments section of the form.
- When you have completed the form, just click the 'Send' button to complete the process.
...
- To check on the status of an existing ticket, or follow up on it, simply go click on "View Open Tickets" next to the "Submit New Ticket" button.


- You will now be able to see all your currently open tickets and their critical information such as when they were opened, last updated, which department they are in and so on.


- From the ticket list, you can open one of the listed tickets, or filter the list via the view drop down at the top right if you wish to review closed tickets as well.


- When you click on a particular ticket, you can respond or add information by clicking the 'Post a Followup', 'Reply', or 'Reply and Quote' links. You can also link related tickets via 'Link'.
- If you click the edit link, you will be presented with a similar form to what you saw when initially creating the ticket, with those options that are already a part of the ticket such as the subject and department removed.
...
We hope that you have found this article helpful. Need more help? Check our other articles or contact our staff via email, phone, or web chat.
Related articles
| Content by Label | ||||||||||||||||||
|---|---|---|---|---|---|---|---|---|---|---|---|---|---|---|---|---|---|---|
|
...