Need to add additional people or contact addresses to your account? Want to make sure that everyone on your staff can access and request assistance on your account? This article will show you how to add authorized users to your account in our client portal and make sure everyone you need to be able to access your account can do so.
If you need to update the Primary Account holder information, please see this article instead: How to update your primary account information
Step-by-step guide
Here are the steps you'll need to take:
- Log in to the Vivio Client Portal
- Select "View Contacts" under "Client Profile." After you click on the link, you will see a list of your Active Contacts, including the primary account holder and any additional users if you have added any.
- To add the user of your choice, select "Add Contact".
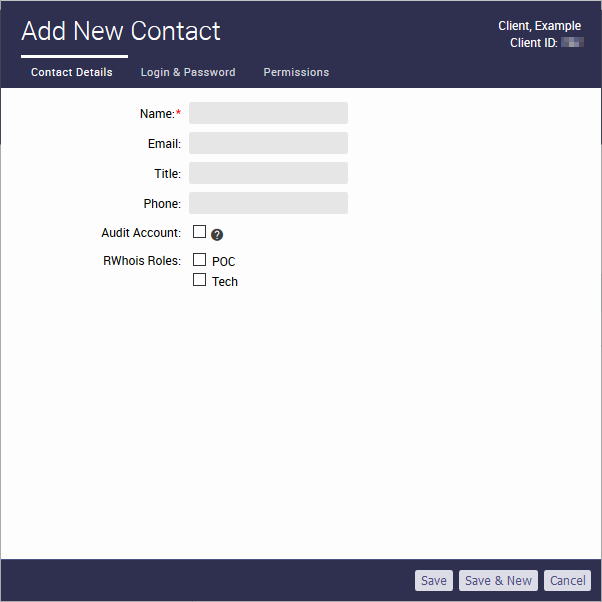
- In the window which opens (see below), fill out the new user's information. Vivio recommends utilizing the Title field to indicate their position or relationship to the account.
- If you wish the contact to receive copies of all system notices, select the "Audit Account" checkbox. If you'd like the contact to appear on your Whois information for your domain addresses, you can select "POC" or "Tech" depending on your needs.
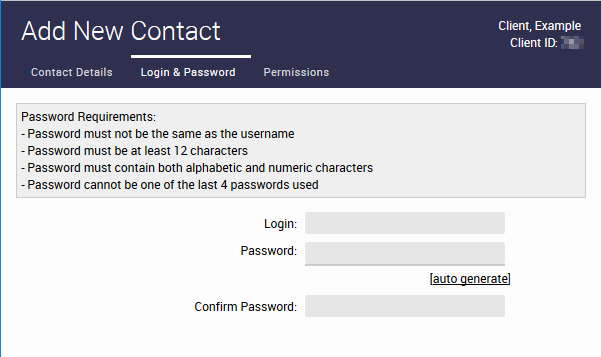
- Once you have filled in the contact information, select the 'Login & Password' tab at the top of the form. Here you will be able to set the contacts login name and enter or generate a password. If you do not set a password the contact will need to perform a password reset when they first log in and set a new password.
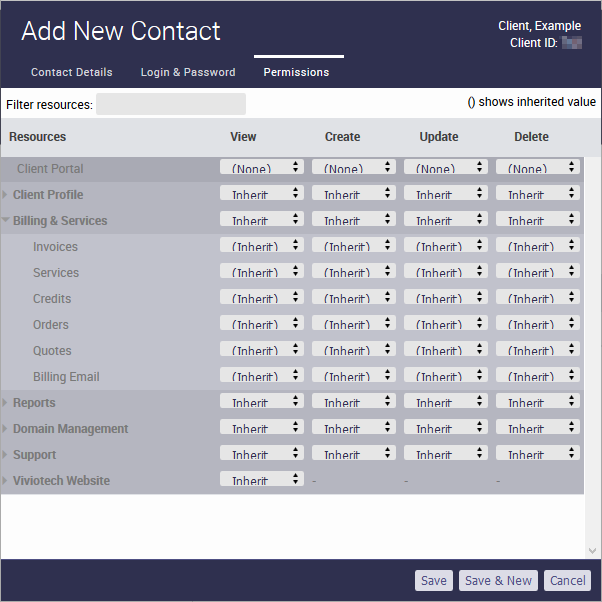
- Next, click on the 'Permissions' tab and select which abilities you'd like the user to have. Note that each section can be expanded to allow for detailed permissions assignment, as shown in the image below for Billing & Services. For example, in the Billing & Services section, you can authorize the contact to receive billing emails, which will add them as recipients of future invoices. If you don't select any permissions, they will not have access to any options in Portal. After you're happy with the selected permissions, click "Save."
- Final Step - Notify the new user what abilities they have on your account so that they know what they can/can't do if they contact us. Any person listed on your account will be able to contact our Support department for assistance, so be sure you only add those contacts whom you trust with access to your services.
That's all there is to it! If you have any questions, please see the related articles or contact our Support department via email, phone, or web chat for further assistance.


